Showing posts with label Thrift Store Finds. Show all posts

Monday, April 15, 2013

Flea Market Find... Pink Vintage Lamp

Hope everyone had a good weekend!  Just a quick post to show off my cute find over Easter weekend!  We went to my parents for the holiday and Mom and I were able to get away (just the two of us) for some shopping!  I scored this adorable pink vintage lamp base with aged brass detail for $8.99!  Yay!

 It needed rewiring, which was intimidating at first, but resulted in an easy fix!  After two weeks of looking for the perfect shade, I found this one at Target today!   I'm in love with their Threshold collection.  Many things I gravitate to (and have brought home) are from the vintage line.  
Here it is...  I'm in love with all the details!  
  
Loving the aged brass detail of the faux switch and lattice design on the neck.  The base has a beaded trim (as does the top) and soft rounded lines.  The lady at the shop thought the rewiring would cause hesitation in my purchase.  My mom convinced me that it was easy enough!
The lamp was worth the small bit of labor it took to get it working again!  :)
Here's the detail of the lamp with the light on... I think the criss-crossing pleats give it a feminine touch.  
 
Total cost:
lamp base - $8.99
rewiring kit - $7.99
lamp shade - $14.99
Just over $30 for this makeover!  I'm a happy bargain shopper!
Have a great week!

Saturday, February 04, 2012

Old Window Turned Message Board

It's the weekend!  YAY!  Time to put the finishing touches on those projects I've started.  We finally finished the message board for our walk-in pantry.  It turned out just how I pictured, so excited to show you...
Here's the before of the two paned window we used...
As discussed in the last post, we simply cut two pieces of thin MDF (one slightly bigger than the other) to fit in each frame.  We covered the top with galvanized flashing and sprayed the other with chalkboard paint.    
It was difficult to get a good picture, so please excuse the weird angles.  
Here's the after:
  
  Cute little handle for my towel...
As you can see in this picture, we are adding trim to the shelves and applying the fabric wallpaper.
Still need to find some hooks for hanging my aprons, but couldn't wait to show you!  
Have a great weekend!

I'm linking up to these parties:

Funky Junk's Sat Nite Special

Friday, February 03, 2012

Steal of a Deal... Old Windows

Happy Friday to you!  I hope you've had a great week!  We've been working on a cute message board for the walk-in pantry using an old window.  I picked up several from a local antique store for $12 each, all of them different. 
 The day I purchased these, I saw another person walk out with two four paned windows.  I asked the lady at the counter if the seller had more available.  She just so happened to be the seller and brought four more in from her car.  She hadn't had a chance to clean them up, so this is how they looked when she bought them...
I fell in love with all the details.  Old hinges, chipping paint, rusty latches...
 There are so many things you can do with old windows.  I've pinned several ideas... like this one here:
This idea comes from my cousin, Angie @ flibbertigibberish.  Her husband snagged these old french doors from another man's dumpster, with permission, of course.  I love how they're used to display pictures of their precious kids!
I plan to do something similar with the eight paned window,
displaying black and white photos of our wedding day.
 Now, about that message board for the pantry...  hubby cut me two pieces of MDF for both openings.  We also purchased galvanized metal flashing for the top to make a magnet board and the bottom will be a chalkboard for writing down pantry items, etc.  I adore the handle and have decided to hang a towel from it for cleaning off the chalkboard.  I'd like to add some hooks on either side for my aprons.  We're almost done with this project.
Will post results soon!  Hope you have a wonderful weekend!

Friday, November 04, 2011

Shabby Chic Chairs

Hi again!  I've been doing some shopping at my local thrift store this week.  Every Tuesday they have 30% off furniture.  The truck had just pulled up when I was heading out the door.  They were unloading a recent pick-up and these chairs caught my eye! 
Aren't they darling?  They were $4.99 each, after the discount, I paid $7.57 for both!
They are very shabby, lots of chips and cracks in the paint.
 A good scrubbing with Krud Kutter and this chair will look a lot better.  
I may add more shabbiness by sanding and distressing.  I'm thinking one will go on the porch (isn't she cute sitting there?) and the other stripped and repainted.
This was my first time to use Citristrip... 
after about 30-45 minutes, it was ready for clean-up!
This stuff works great, however, I think I prefer flat surfaces when stripping old paint. 
 So many curves and crevices on this antique!
Back in the day, this chair wore many colors.  
I discovered yellow, turquoise, green, blue and black!
I'll be back soon to show you my progress.  
I have a feeling this one's going to take awhile!  
Have a great weekend! 

I'm linking to these parties:

Saturday, October 22, 2011

Goodwill Mirror + Halloween Dresser

Hi!  I hope you're having a good weekend.  Thanks for all your sweet comments about my Homemade Chalk Paint Dresser, it was a fun project and I'm looking forward to trying it again soon!  We attended our daughter's school Fall Ball last night.  It was great to catch up with all the parents and enjoy the fun activities!

I recently posted about my Goodwill finds and wanted to follow up on the mirror I purchased for $15.  Here it is the day I brought her home...
Sanded, taped off and ready for paint...
I used Krylon's Ivory in a satin finish, it took about 3-4 coats.
Before:
After:
Just what this entry needed!  
The lamp shade was a thrift store find for $2.99 and lamp base at Goodwill for $7.99!  
The homemade chalk paint dresser tucked away in the corner...
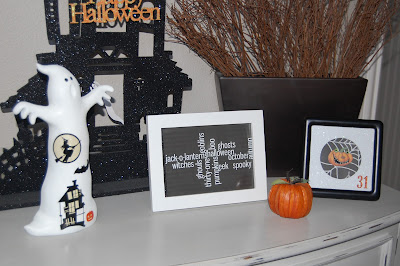
When I found the ghost at Hobby Lobby a few years back, it started out silver.  I sanded it down, sprayed it white and added Halloween rub-ons.  I created the framed subway art and the spider web pumpkin art with scrapbook paper and stickers.
Our son made the pumpkin bag using a carrot as the paint brush.  Love it!
The kids love the haunted house.  We light it up at night with LED lights.
Happy Halloween!  :)  

I'm linking up to:


Saved by Suzy

Wednesday, October 19, 2011

Antique Medicine Cabinet

It's been almost a month since my last post.  I promise I have a lot to share, as I have been busy with lots of fun projects!  This might just be my longest post yet, but one things for sure, it has tons of pictures and everyone likes pics, right?  :)  I've been on an "organizing my house" kick lately and have been on the hunt for a storage cabinet for our master bathroom.  I wanted something that made it easy to access things at eye level.  I was going to ask hubby to build me something, but until I start painting some of the pieces he's already built for us (namely the kitchen banquette), I knew I was on my own on this one!
My side of the counter always seems to get cluttered the fastest, due to our lack of storage.  I mean, the linen closet is great and the builder grade cabinets are nice for bigger things, but they're not close at hand for those everyday items.  A girl can never have enough storage, you know.  :)  I decided to visit a local Antique Mall a few weeks ago, we have a lot of them around here.  I'd been there almost an hour browsing through all the booths and was about to walk out when this caught my eye...
It's solid wood and I could tell it was a DIY build from many, many years ago.  The wood grains were gorgeous and the doors were one solid piece with the centers cut out and rounded edges.  It was a great buy at $14.95!  After I removed the doors and sanded the entire piece, I decided to paint it an off white to coordinate with the rest of the room.  
 I just love the old hinges, I left them as is...
After sanding, almost ready to paint...
To my surprise, it took FOUR cans of Krylon's Ivory (in satin) to cover this piece.  The wood was very dark and the grains in the wood were so distinct.  Since it was an old piece, I decided that full coverage wasn't necessary, as I liked all the imperfections that came out when it was painted.
I had a visit from a friendly honey bee... exploring the nooks and crannies of the interior.  
 
The doors had thick mirrors in the center and I had the perfect idea to change the look.  There was no need for more mirrors, so I decided to take the table cloth fabric that I used to upholster the vanity stool  (also used in the Sea Salt Sunroom) and use it to cover the cabinet doors.  
I used the mirrors as a template, traced and cut them to size.
Then, using spray adhesive, I adhered them to the mirrors.  
 Fabric adhered to mirrors (above)
I wasn't sure I'd be able to reuse the old hinges, having to remove them several times during the process, thankfully they were salvageable!  Before, they blended in with the dark wood, now you can see how they pop and really give the piece more character!    
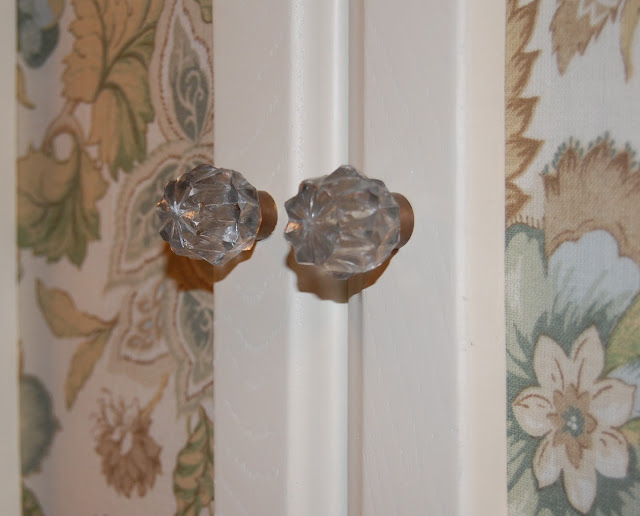
Hobby Lobby just so happened to have their knobs 1/2 off that week, so I grabbed two gorgeous gray-blue glass knobs.  They're the perfect finishing touch; I love how they look against the off white. 
Hubby and I hung some things last weekend and now the medicine cabinet makes it's home on the bathroom wall between the two mirrors.  I decided to relocate the Goodwill clock I refurbished above the cabinet to add height to the space.  I think it turned out great and I'm so excited to have easy access to my everyday items.
I love my garage sale find vanity tray for $3!
I've had this ceramic hand mirror since I was a little girl, it's a favorite of mine.
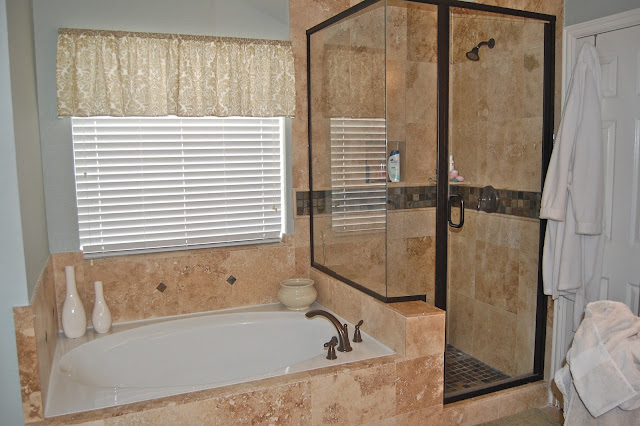
So now you finally get to see the other side of the master bathroom.  You can go here to read about our bathroom renovation.  After the pros were finished, we painted the walls in Sherwin Williams Austere Gray, installed new light fixtures, hung mirrors and a few framed pieces.  The final touch was the clock and refurbished antique cabinet. 
 Before...
After
Eventually, we'd like to paint the cabinets, but for now, we're happy!  
Stay tuned, as I share with you my FIRST furniture re-do using homemade chalk paint!
Here's a sneak peek...
I went to my local Anthropologie (they just opened in early September) and purchased these adorable knobs for $2.95 each, normally $10 dollars each!
Lisa @ A Vintage Vine assisted with this project!
I'll be back soon... I'm excited to show you!

I'm linking up to:


Related Posts Plugin for WordPress, Blogger...