It's been almost a month since my last post. I promise I have a lot to share, as I have been busy with lots of fun projects! This might just be my longest post yet, but one things for sure, it has tons of pictures and everyone likes pics, right? :) I've been on an "organizing my house" kick lately and have been on the hunt for a storage cabinet for our master bathroom. I wanted something that made it easy to access things at eye level. I was going to ask hubby to build me something, but until I start painting some of the pieces he's already built for us (namely the kitchen banquette), I knew I was on my own on this one!
My side of the counter always seems to get cluttered the fastest, due to our lack of storage. I mean, the linen closet is great and the builder grade cabinets are nice for bigger things, but they're not close at hand for those everyday items. A girl can never have enough storage, you know. :) I decided to visit a local Antique Mall a few weeks ago, we have a lot of them around here. I'd been there almost an hour browsing through all the booths and was about to walk out when this caught my eye...

It's solid wood and I could tell it was a DIY build from many, many years ago. The wood grains were gorgeous and the doors were one solid piece with the centers cut out and rounded edges. It was a great buy at $14.95! After I removed the doors and sanded the entire piece, I decided to paint it an off white to coordinate with the rest of the room.

I just love the old hinges, I left them as is...

After sanding, almost ready to paint...


To my surprise, it took FOUR cans of Krylon's Ivory (in satin) to cover this piece. The wood was very dark and the grains in the wood were so distinct. Since it was an old piece, I decided that full coverage wasn't necessary, as I liked all the imperfections that came out when it was painted.


I had a visit from a friendly honey bee... exploring the nooks and crannies of the interior.

The doors had thick mirrors in the center and I had the perfect idea to change the look. There was no need for more mirrors, so I decided to take the table cloth fabric that I used to upholster the vanity stool (also used in the Sea Salt Sunroom) and use it to cover the cabinet doors.

I used the mirrors as a template, traced and cut them to size.
Then, using spray adhesive, I adhered them to the mirrors.
Then, using spray adhesive, I adhered them to the mirrors.


Fabric adhered to mirrors (above)

I wasn't sure I'd be able to reuse the old hinges, having to remove them several times during the process, thankfully they were salvageable! Before, they blended in with the dark wood, now you can see how they pop and really give the piece more character!

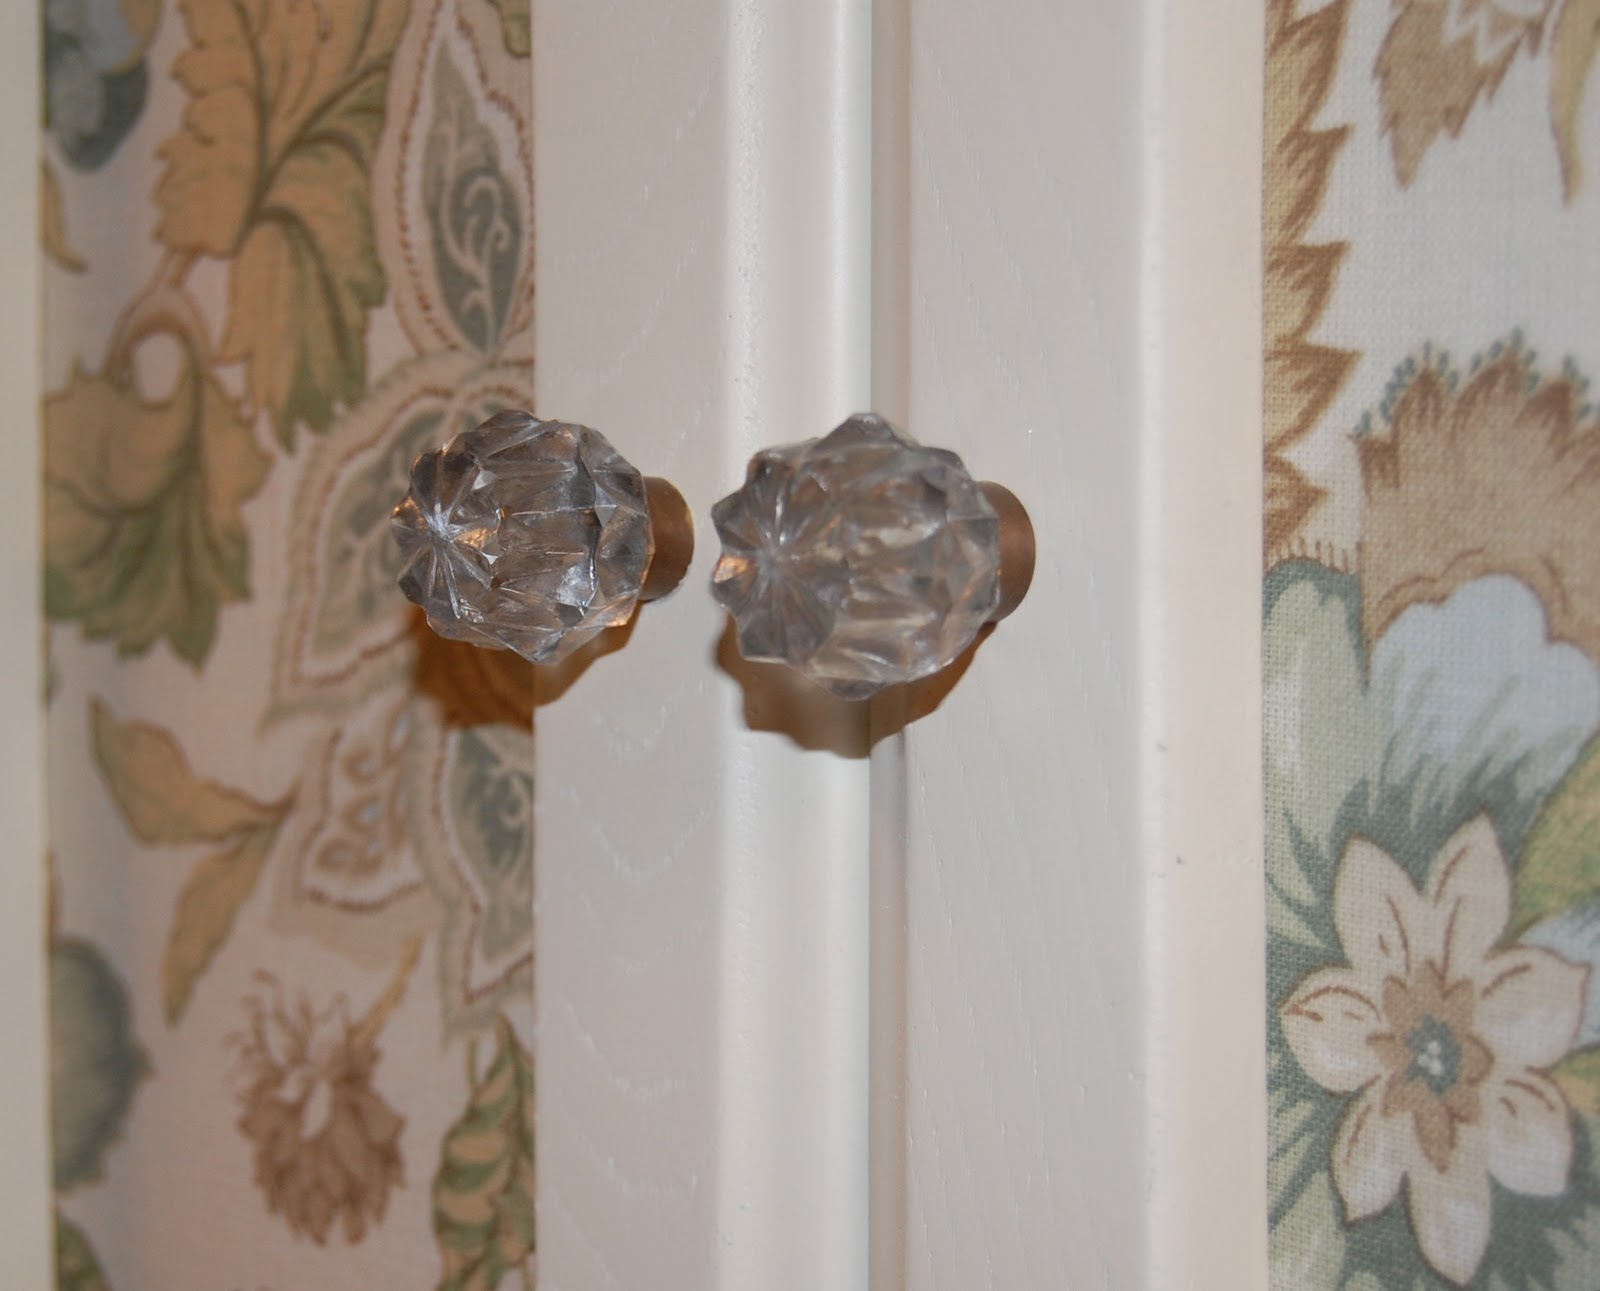
Hobby Lobby just so happened to have their knobs 1/2 off that week, so I grabbed two gorgeous gray-blue glass knobs. They're the perfect finishing touch; I love how they look against the off white.
Hubby and I hung some things last weekend and now the medicine cabinet makes it's home on the bathroom wall between the two mirrors. I decided to relocate the Goodwill clock I refurbished above the cabinet to add height to the space. I think it turned out great and I'm so excited to have easy access to my everyday items.


I love my garage sale find vanity tray for $3!

I've had this ceramic hand mirror since I was a little girl, it's a favorite of mine.

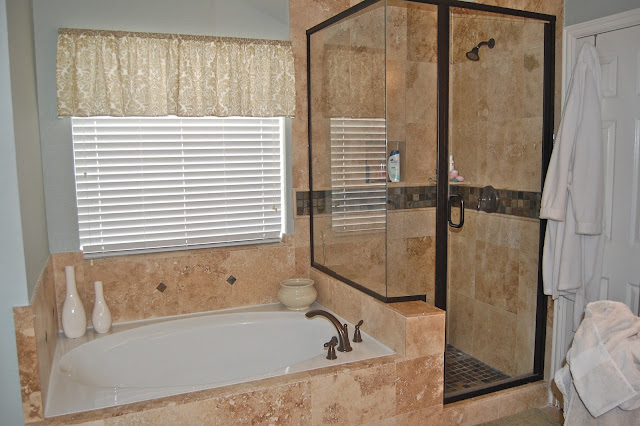
So now you finally get to see the other side of the master bathroom. You can go here to read about our bathroom renovation. After the pros were finished, we painted the walls in Sherwin Williams Austere Gray, installed new light fixtures, hung mirrors and a few framed pieces. The final touch was the clock and refurbished antique cabinet.

Before...


After


Eventually, we'd like to paint the cabinets, but for now, we're happy!
Stay tuned, as I share with you my FIRST furniture re-do using homemade chalk paint!

Here's a sneak peek...

I went to my local Anthropologie (they just opened in early September) and purchased these adorable knobs for $2.95 each, normally $10 dollars each!


Lisa @ A Vintage Vine assisted with this project!
I'll be back soon... I'm excited to show you!

I'll be back soon... I'm excited to show you!

I'm linking up to:


10 comments:
that fabric is amazing. love it.
michele
Looks great! The fabric is perfect for your bathroom!
I love, love, love your cabinet and the whole bathroom looks lovely. xo
(new follower here!)
Oooohhh, you've done such a FABULOUS job with the cabinet!! Doesn't look like the same piece at ALL!
Deborah (visiting happily from http://upcyclingmylife.blogspot.com...hope you have a minute to stop by too...)
This looks great! Love it! So creative to use a tablecloth :)
Jenny
www.simcoestreet.blogspot.com
Great job! Love it.
seriously. WHY didn't I see this before I sold a wooden medicine cabinet at my garage sale?!!! So cute. I'd just LOVE for you to share these over at Trash 2 Treasure Tuesday on the Korner!! http://kammyskorner.blogspot.com/2011/10/trash-2-treasure-tuesdays-3.html
Super neat redo! What a difference.
oh my goodness, how adorable is that! love it's scalloped apron!
wow! This cabinet turned out beautiful! Love how you added fabric to the glass inserts! Your bathroom is beautiful. :)
Post a Comment