Tuesday, May 31, 2011

I've Been Featured on Krylon's "Projects in a Can"

Hope your Memorial Day weekend was both relaxing and productive.  We spent most of our time outside doing some much needed yard work and entertaining the kids.  It took hubby most of the day to mulch the front yard... 43 bags and we still didn't buy enough!  
I'm SO excited to share with you that about a week after I posted the Flower Mirror
tutorial, I received an email from a Krylon rep asking me if I'd like to submit my project on their "Projects in a Can" site.  I checked with a few local bloggers to make sure it wasn't spam.  Being a new blogger, this was the first time I had received an opportunity like this, so I had to be sure!  I got the "all clear" and submitted my tutorial the next day!  As soon as it's reviewed by the department, it will hopefully be available to view on their facebook and twitter... so cool!  I checked today and found it on their web site.  You can view it here in their Creative Corner.


As I've been browsing through their site; I've noticed other projects I've seen on blogs I follow.  It's probably nothing new for so many of you, but being new at this, I was so giddy at the chance to have my project featured!  Many thanks to Kathleen @ Krylon for contacting me!  :)

Sunday, May 29, 2011

In LOVE with Pinterest!

My dear friend and neighbor, April recently introduced me to Pinterest and I just gotta say, it was love at first sight!  What is Pinterest you ask?  Pinterest is like a virtual pinboard - a place where you can create folders and collect things you love and share them with others.  It also lets you "follow" collections that other people have created!  It's seriously addicting!  

We've had several DIY home renovations in the works and having access to this kind of filing system has helped tremendously!  I love being able to gather inspiration from ANYWHERE on the "www" and follow other people that have a common taste.  They even have a "pin it" button that aides in letting you bookmark anything you see and add it to your created folders.

Sorting and cutting out pictures from magazines has been drastically reduced and I'm definitely all about less paper around here!  :)  Just look at some of the great finds I've been able to add to my pinboard...

Angled kitchen banquette via Elements of Style
We hope to create something similar to this in our kitchen!

Foyer aqua hall tree via Simply Seleta

Big Girl's Room Art Collage via Hello Newman's!

Beautiful fireplace mantel via A Creative Beginning,
inspired by Layla @ The Lettered Cottage

So, if you have a Pinterest account, I encourage you to add a "Follow me on Pinterest" button to your sidebar so you can share what inspires you with others!  If you don't, you can register by going to www.pinterest.com.  They will send you an email thanking you for joining the pinterest waiting list.  Then, about a week later, you will receive an invitation to join Pinterest.

I hope that you find Pinterest to be just as helpful!  Oh, and by the way, I'm not getting paid to write this, I'm just super excited and HAD to share my newest discovery with you!
Happy pinning!  :)

Thursday, May 26, 2011

The Magic of Spray Paint

I'm always on the hunt for re-purposing things in my home.  I used to decorate with a lot of dark, oil rubbed bronzed decor and I've seen how other bloggers have used what they have to change the look.  I'm all about that!  Especially since I still love what I own, just not the color of it!  So I purchased some Rustoleum's Heirloom White and went to town on some accessories around the house.

Here's a picture of them before: 
I had already started spraying the candlesticks when I realized I hadn't taken a picture!  As you can see in the second picture, they were a set of three in black.  So excited to use what I already have!  I spent just under 10 dollars on spray paint... using 40% off coupons from Hobby Lobby!
Here's a peek inbetween coats...
There's the Goodwill clock I showed you in a previous post!  
Almost finished with her transformation!  
What a difference spray paint can make!

Here are some of the pieces in their new homes!
The soap dispenser tray...  now it pops off the counter!   
Before, I couldn't really see it's beautiful detail!
One of my favorite DIY's...  These three painted wallpaper canvases were completely inspired by Thrifty Decor Chick!  For a full tutorial on how to make your own, click on the link!  Thanks, Sarah!  I "lurve" them!  
The mirror, birds and candlesticks make their home on our mantel!  So much better!

This is one of my favorite spots, I was inspired by 
Centsational Girl's kitchen and her dining room table decor.  Love it!  
I couldn't help but post lots of pictures!  
Here's the lamp base in the hallway outside our bedroom.
The other pieces have made their home in our entertainment center, master bath and bedroom.  I'll be sharing in a future post how I used these old but new treasures.

I scoured the house and found some more pieces!  Come back to see what I've done with them.  Some will be painted Heirloom White and others will receive my newest discovery... Krylon's Watermelon and Blue Ocean Breeze!
An oldie but goodie... I found this cheese dome at Goodwill for $3!  I plan on making my own cheese dome cloche!  Thanks to Sarah and Allison!  Hope you're having a great day!

I'm linking up to:


Tuesday, May 24, 2011

Beef Jerky Marinade

This is a HUGE favorite around our house... even our kids ask for it!  My hubby has been searching for a dehydrator for quite some time now (he likes to do plenty of research before purchasing) and surprised us with an Excalibur Dehydrator. Even before we got it, he was out there on the "world wide web" searching for a jerky marinade and knew that Food Network's, Alton Brown, host of "Good Eats" would not disappoint!

So, without further ado, here's the "oh so yummy" recipe:

1 1/2 to 2 pounds flank steak (we have also used a thin cut sirloin tip or milanesa)
1 cup Worcestershire sauce
1 cup soy sauce
2 tablespoons of honey
2 tsp. onion powder                                          
2 tsp. garlic powder
1 tsp. crushed red pepper
1 tsp. fresh ground pepper
2 tsp. liquid smoke

Here's a few packaging labels of the meats we've used...


Place an opened gallon sized zip-loc bag into a quart size plastic container and fold the tops of the bag over to hold bag in place.  Combine all but the steak into bag and stir with a whisk.  Set aside.

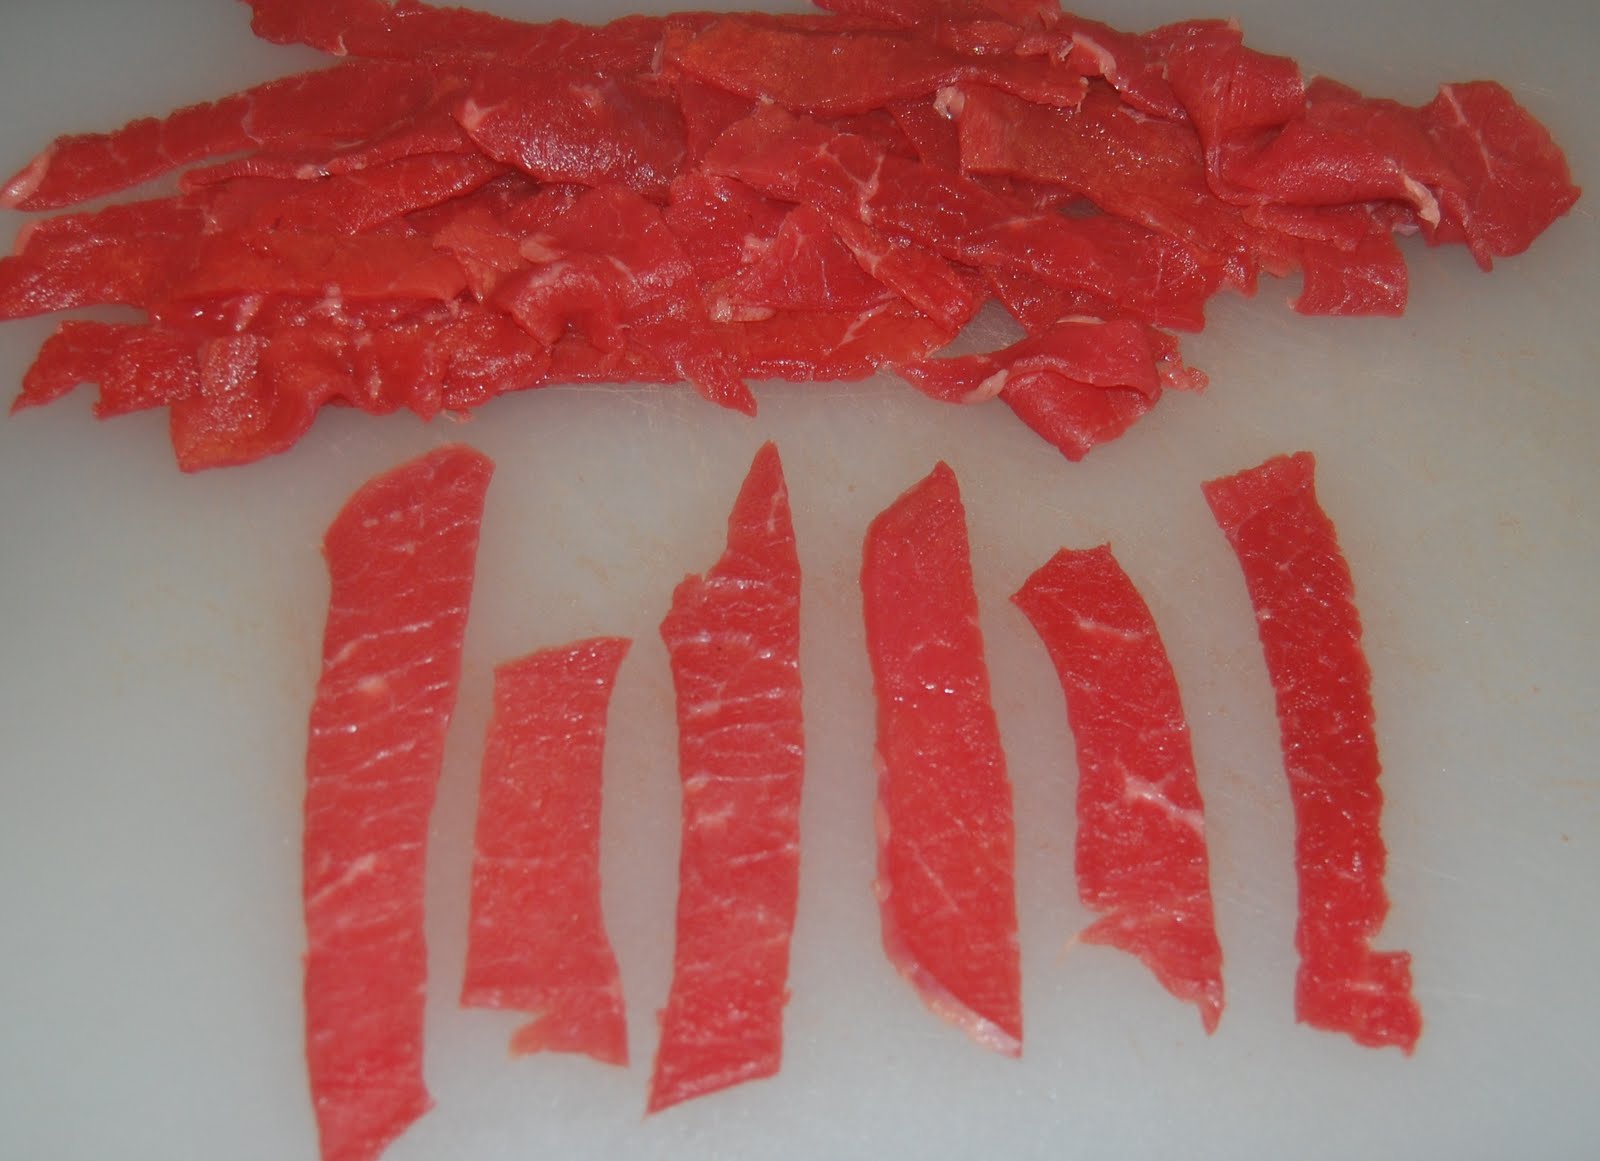
Trim the flank steak (or in our case thin cut milanesa) of any excess fat and cut steak into strips, about half an inch or more thick.  Place all trimmed and sliced meat into your zip-loc bag, seal and make sure all meat is covered.


Place your marinated bag of meat in a pyrex dish, refrigerate and marinade for up to 24 hours.  Least amount of time can be 6-8 hours, but we like ours nice and flavorful!
Note:  Be sure to turn your meat every so often so all meat is well marinated.


After it's marinated for the desired time, line cookie sheets with paper towel and take marinated steak out of bag.  Blot excess juices off the meat and place on your dehydrator trays, spaced evenly so strips aren't touching.  Once you have all your meat on trays, sprinkle some freshly ground pepper over top (optional) and place in the dehydrator, turned to the beef jerky setting.


In about 4-6 hours (depending on the thickness of your meat) you'll have yourself some delicious homemade jerky!  Enjoy!
You'll find me at these parties:


I'm linking up to Rhoda's Home May'd Recipes Link Party!  

Fourth of July Flag Cake

I first saw this cake on Sarah's blog and knew I had to give it a try!  Elissa at 17 and Baking (and her father) are the creative genius' behind this beautiful cake.  


Since I was trying this for the first time (and wasn't sure if it would turn out), I used a basic white cake mix and poured it into three 9 inch round cake pans.   


The recipe directions are per Elissa at 17 and Baking...
To make the cake, you use three layers of white cake.  Using food coloring, one layer is dyed blue, one red and the last layer is kept white.  The three layers are leveled so they are all the same height.  Each layer is about 2 inches tall.

Using a serrated knife or cake leveler, slice the red and white layers horizontally in half. So you have a blue layer (2″), two red layers (each 1″), and two white layers (each 1″). Set one white and one red layer aside, those will be the bottom two stripes of the flag.


You only want a square of blue in each slice, not an entire layer. Stack the blue layer, white layer, and red layer on top of each other. Using a serrated knife, cut a large circle through all three layers. I used a bowl as a guide. Now you have a ring of blue (2″), a ring of white (1″), a ring of red (1″), and three inner circles in each color (the blue is 2″ and the other two are both 1″).  Save the inner circle of blue and the outer rings of red and white.  I'll explain why in a minute...


To assemble the cake, frost the bottom two layers together – set the uncut white layer on a plate and spread with frosting. Top with the uncut red layer. Spread the uncut red layer with frosting, then set the blue ring on top. Use a spatula to spread a very, very thin layer of frosting around the inside edge of the blue ring. This will help keep the blue layer and the two top stripes together.


Place the white inner circle on top of the uncut red layer, inside the ring of blue. Frost, and top with the red inner circle. Frost the entire cake and voila, it’s a flag cake!


So, back to why you keep the parts you cut away.  Once you cut the layers, there is quite a bit of "waste" involved with this cake.  Don't throw it away!  You can save it for serving with ice cream, making a layered cake trifle with whipped cream and berries!  Be creative!  :)


Okay, now for the frosting... the best part!  When making the frosting, the cream cheese can actually be used straight from the fridge, no need for it to be at room temp!  Here it is, plain, but the flavor combinations are endless… add zest or juice or grated ginger or extract or whatever you’d like! 
For the frosting:

16 oz. cream cheese
10 T. unsalted butter, at room temperature
4 t. vanilla extract
4 c. powdered sugar, sifted

Place the cream cheese, butter and vanilla extract in the bowl of an electric mixer. Cream together until well-combined and fluffy. Gradually add the powdered sugar, mixing very well to combine and make a smooth frosting.

The frosting can be made a day ahead and stored in an airtight container in the refrigerator. Be sure to allow enough time for the frosting to come to room temperature before using.

The best part about the frosting is that you can use cold cream cheese... straight from the fridge!  Here it is, plain, but the flavor combinations are endless… add zest or juice or grated ginger or extract or whatever you’d like!  


It turned out great and it is so delish!  Now, if you don't mind, I've attached several pictures of this patriotic masterpiece!  My family and I LOVE fruit so I donned her with raspberries and blueberries!  YUM!  Hope you try it out! 


I'm linking up to Rhoda's Home May'd Recipes Link Party!  


Wednesday, May 18, 2011

Before and After: Metal Tile Transformation

I'm excited to share one of my favorite transformations with you.  As I mentioned in a previously post, I purchased these four tiles at Kirkland's a few years ago.  At the time, they were the perfect colors for the room and went well with my window panels.  Well, let me just say... this girl needed a change.  In my opinion, the red was too bold for such a big room.  I wanted a more relaxing space, it's true what they say about color, it can go a long way toward setting the mood and energy in a room.
I knew I wanted to keep the tiles because of their size and style.  I've seen old architectural tiles at local antique shops and thought I could give them a similar look.  First, I started by priming the walls.  I needed to start with a clean slate to know just what color to use... that's how I roll.  My daughter helped me prime over the red... princess style!  :)
For the walls, I chose a beautiful grey blue by Behr called Silver Tinsel.  I love this color! It's the perfect shade! After two coats on all three walls, I knew painting the tiles an off white would make them pop! Helpful tip: When painting over red (or any dark/bold color), use a tinted primer that is 70% of your new wall color.
I scuffed up each tile with a 220 grit sand paper to help the primer stick.  Then, I gave each one 2 coats of Sherwin Williams Dover White.  I decided to distress them to give them that shabby vintage feel.  I took a rag and put my beloved Ralph Lauren Smoke glaze all over, then whipped it off.  Are you ready for the before and after?  Okay, one more time...  Here's the before:
And the after:
The room is still a work in progress, but toning down the walls with a more relaxing color made a HUGE difference. I'll give you a peek of how it looks now (minus the Christmas tree, of course).  I haven't done anything but hang panels.  Stay tuned to see what I plan to do with this room!
On a recent trip to Goodwill, I discovered this clock for $3 dollars!  I've been searching for a wall clock for our master bathroom.  I love the detail!  Come back and see what I did with her!  Hope you're having a great day!

Monday, May 16, 2011

Flower Mirror

Happy Monday to you!
So I promised a post about some projects I've done in our home and can't wait to show you what I did with this round mirror I found at Hobby Lobby for 50% off!  Woo-Hoo!
We're using the nursery furniture in our daughter's room, it's very gender neutral, so part of it is still in our son's room.  We purposely purchased two dressers so we could split the set for the two kids.  The dresser we moved out of the nursery did not have a mirror, so I knew once I found the perfect one I'd give it some girlish charm.

Her room has a floral theme - Pottery Barn Kids "Mallory," so I knew exactly what I wanted to do with this mirror as soon as I saw it's shape and size.  After spray painting her with Krylon's "Ballet Slipper," I centered her above the dresser.  Then, I took some 12x12 sheets of card stock and cut random petals for my template, making sure the petals were the right size for the mirror.
I placed them around the mirror with tape and began tracing each one until I liked the spacing.  Then with my coordinating paint, Valspar's High Noon, I began painting each petal, using my pencil lines as a guide.  I kept the mirror in place as I painted each petal, so as not to lose the center.  You'll have to forgive my lack of pictures, I'm still new at the whole "document as I go" process.  :)
And here she is!  I'm so thrilled with the outcome!  The mirror ties in with the bedding and is the perfect finishing touch for the room.  I've searched for a picture of the bedding and unfortunately do not have one available.  The lamp shade shows you the fabric that inspired me.

I hope to create a gallery wall of pictures and her art on the adjacent wall.  I've been collecting frames of different sizes at my local thrift shops.  As soon as I complete my collection, I'll be posting the reveal.  Thanks for stopping by and hope you have a great week!

         I'm linking up to the Home May'd spray paint party at Thrifty Decor Chick
I love your feedback.  Let me know what you think!

Saturday, May 14, 2011

Sneak Peeks...

Hope you all are having a great weekend!  It's in the mid-70's here, perfect weather for doing some much needed yard work!  I wanted to share a few pics with you, to give you some insight as to what I'll be posting in the following weeks.
Here is a mirror I found at Hobby Lobby for 50% off!  She was a steal at $12!  I know, not very exciting right now, but stay tuned to see it's new makeover and where her new home will be!  
This is one of four tiles I purchased at Kirkland's several years ago that no longer work in my home.  Their colors were gold, brown, red and green.  They worked well when the room shared those colors, but I have since gone in a new direction and they needed a change!  I love the designs of each tile, so I knew with a little sanding, painting and distressing they would be perfect!  A few of my friends have the same ones and have asked me to help them revamp theirs too!  Stay tuned to see what I did with these beauties!
Well, I'm off to do some more yard work while the little one is snoozing.  Hubs and I are taking turns doing outdoor chores and entertaining the kids.  It's my turn to dig in the dirt! Be back soon to share my reveals!

Thursday, May 05, 2011

Let's Get To Bloggin'!

Now that I have this blog thing underway, I'm so excited to share the many projects I've been working on.  Projects relating to painting, building storage, revamping and my latest Craigslist find!  In the next few weeks, I hope to share my ideas, inspirations and my works in progress.  Stay tuned...
Related Posts Plugin for WordPress, Blogger...